Improving the Ezviz DB1 doorbell
I am preparing to replace my Nest doorbell with the Ezviz DB1. But first of all, it desperately needed facelift. This wonderful device has two asthetic issues I just couldn’t live with: First, it’s not obvious where the button is, and second, the Ezviz logo looks ugly and cheap. Here’s how I fixed it.
This is the first post in a series about the EZVIZ DB1 smart doorbell. Also see Deepdive into the EZVIZ DB1 Doorbell with Home Assistant and Making a New EZVIZ DB1 Button.
First of all, I am indebted to the wonderful community and resources at ipcamtalk, in particular their incredibly comprehensive guide to the DB1, this review, and this tip by danli.
The Ezviz DB1 should not be confused with any of the other nearly identically named products from Ezviz. The DB1 Pro, DB1C, DB2, and DB2 Pro are completely different devices. The DB1 is actually a rebadged Hikvision DS-HD1, and is also sold as the RCA HSDB2A, LaView LV-PDB1630-U, Nelly’s NSC-DB2 and LTS LTH-7132-WIFI. I am switching to it because I want direct local control of all my devices from Home Assistant, and I can’t have that with cloud-first devices like Ring or Nest (I am switching from a wired Nest doorbell). The DB1 has mostly equivalent specs to the wired Nest doorbell, but has an improved resolution of 2048x1536 pixels (vs Nest’s 1600x1200), and a wider field of view (180° vertically vs Nest’s 160°, which is great for being able to see parcels etc.). I have yet to test the app, but it looks great, basically turning doorbell presses into VoiP calls. The camera is exposed locally via RTSP and Onvif, and with Hikvision firmware also supports local motion detection. It is also less than half the price of the wired Nest doorbell. From a home automation point of view, it has a major flaw in not exposing the button press over an API, but I’ll be fixing that with some help from a Shelly Uni (check back here in a week or two to find out how that worked out).
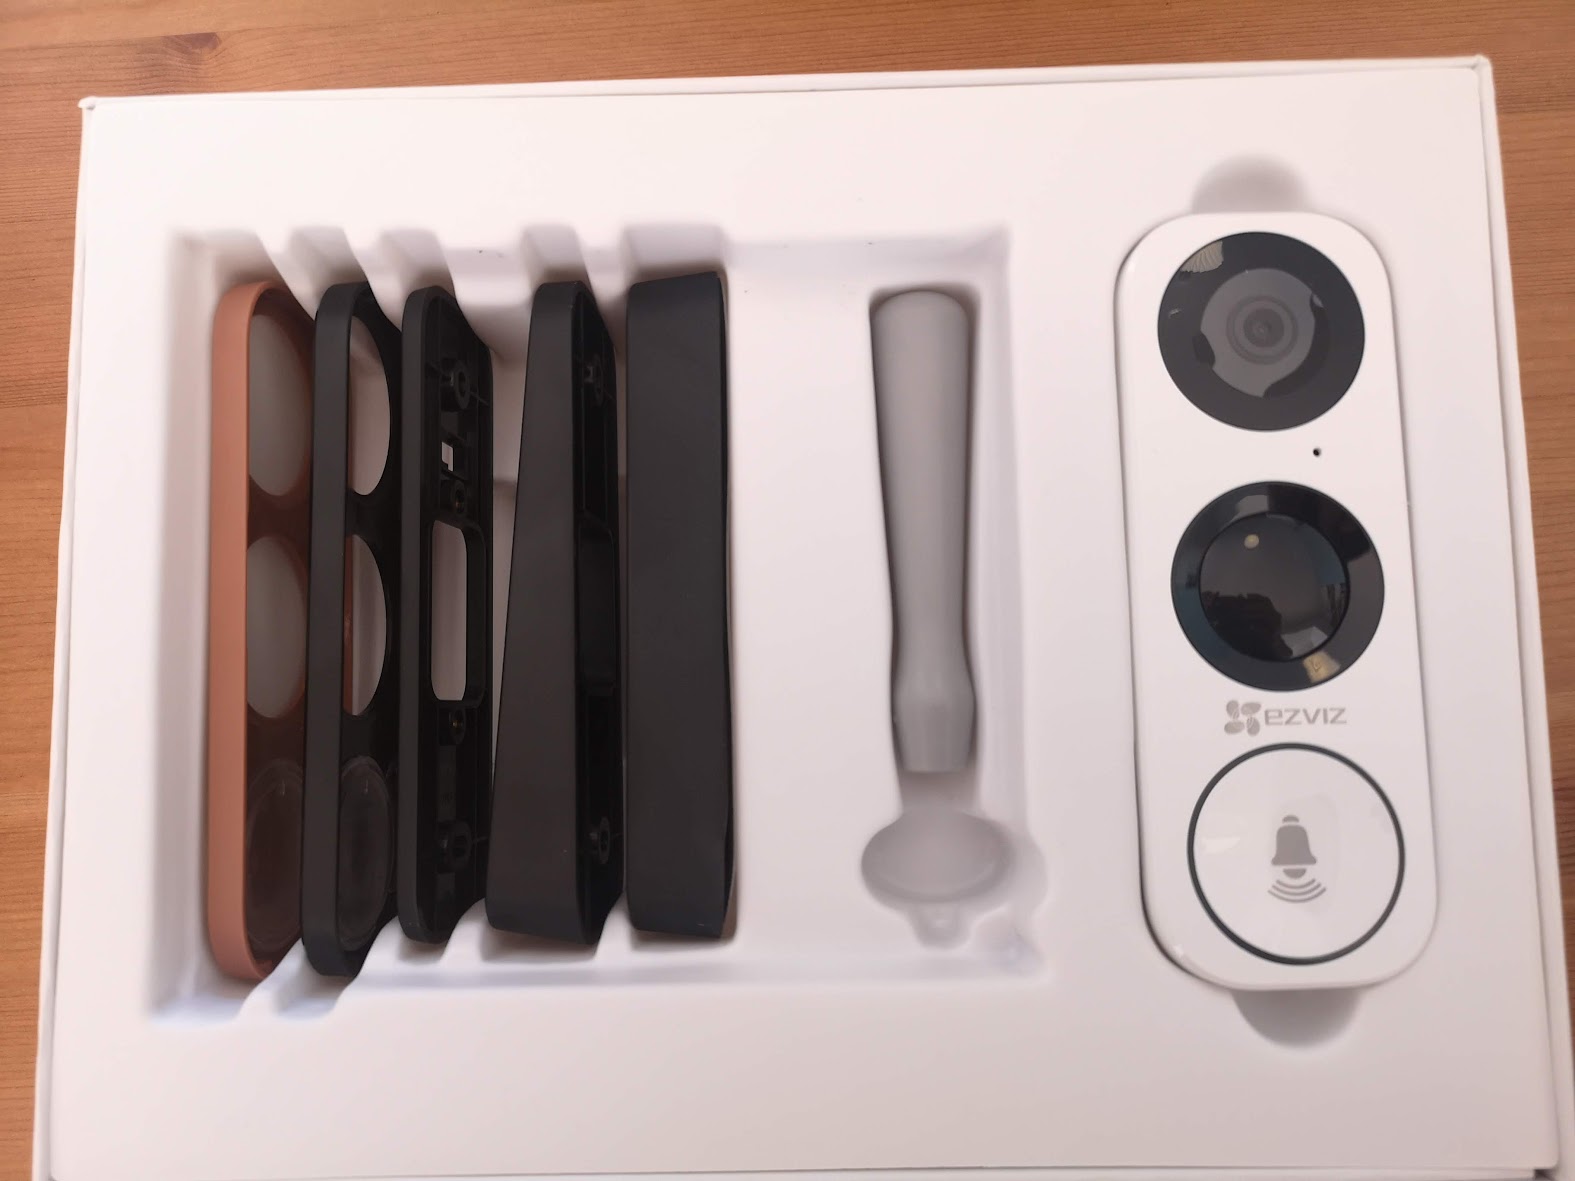
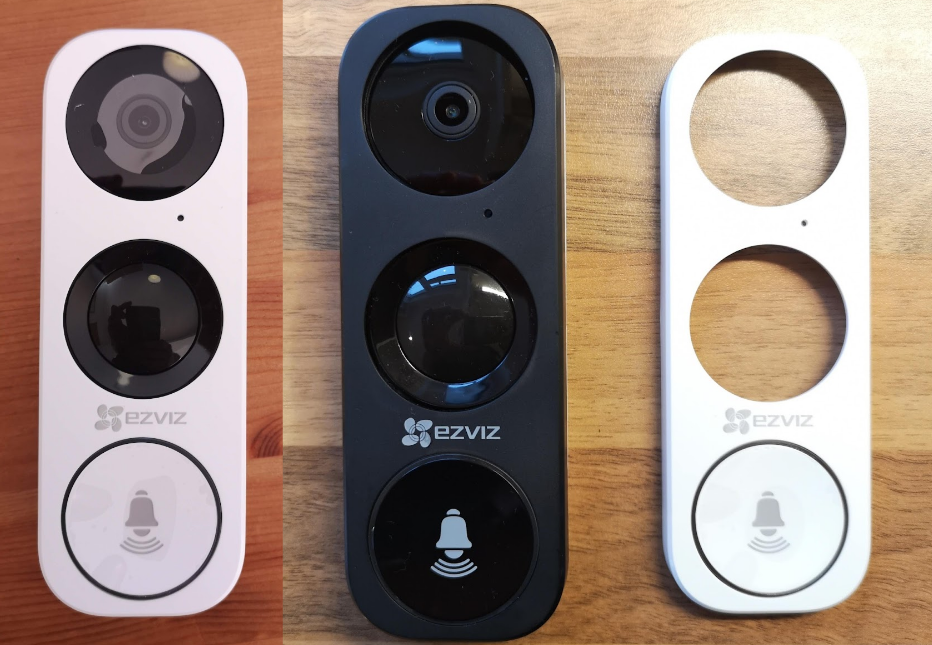
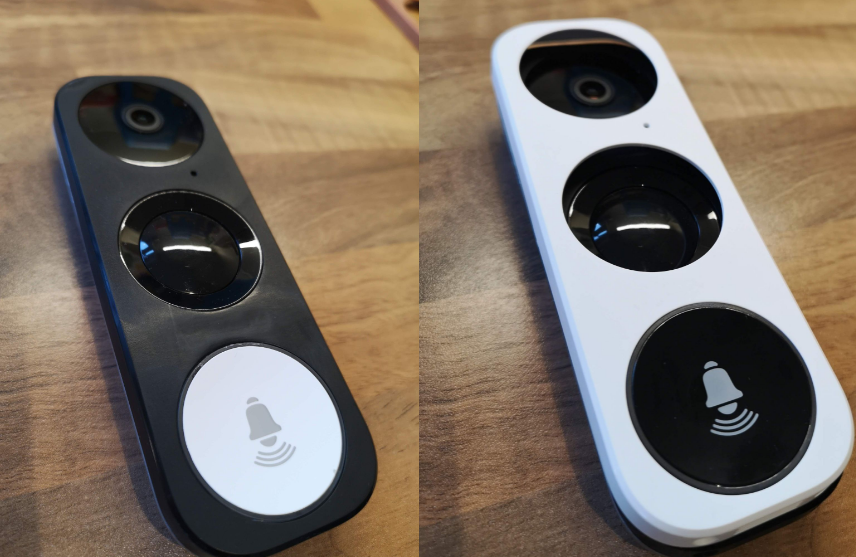
The doorbell features 3 large circles on its face: the camera, a PIR sensor / infrared lamp, and a button. The choice of colors doesn’t make it immediately obvious which one is the button. The white faceplace has 2 high-contrast black circles, while the actual button blends into the faceplate. The black faceplate manages to be even worse, with three black-on-black circles to choose from. My guess is that most people would split the difference and try to press the IR sensor. The reports on ipcamtalk seem to confirm this, with people suffering from cracked IR lenses.
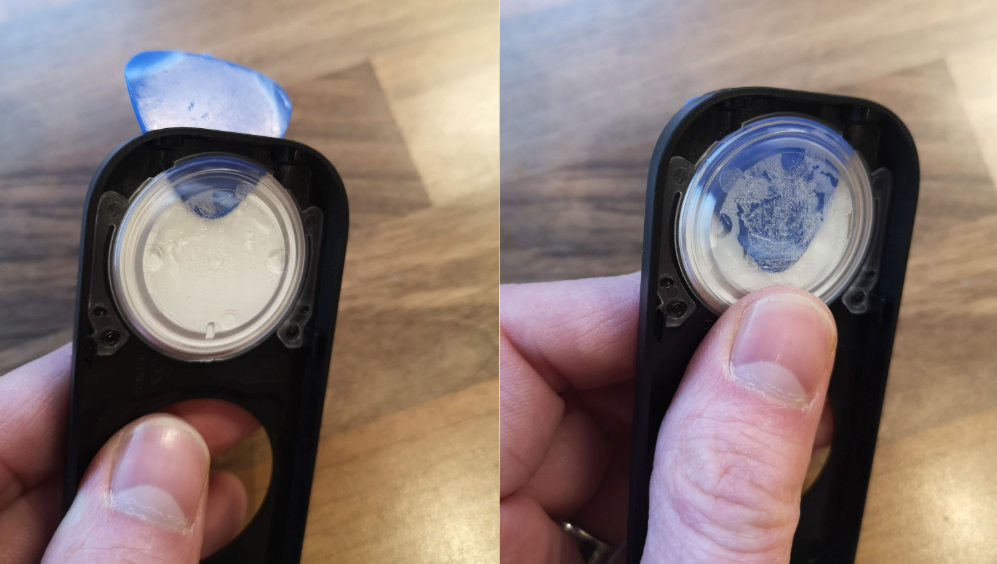
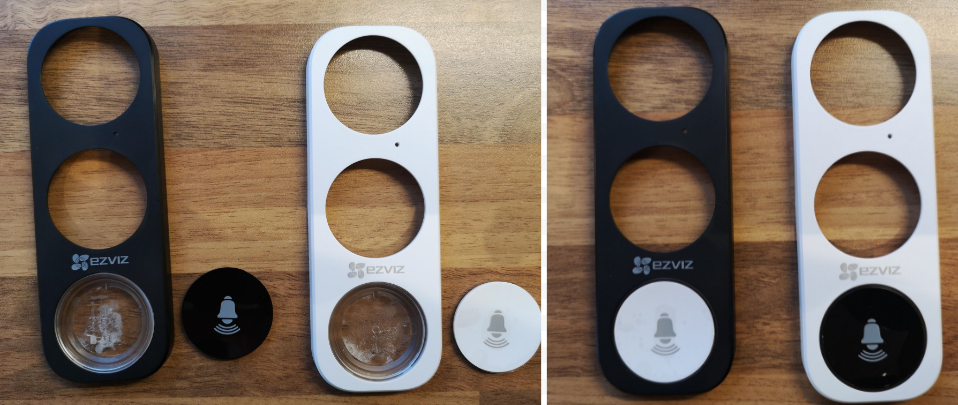
The obvious answer is to transplant the white faceplate’s button onto the black faceplate. I initially thought I was going to have to try to unweld the plastic rivets holding the button into the faceplace, but a tip from danli on ipcamtalk was that the button inserts could be removed instead. He posted some pictures of the process, but I thought I’d share some more. With my forefinger supporting the front of the button, I could slide a guitar plectrum behind the button insert. I did not have to pry the button up. Instead, I just needed to gently push the plectrum through the gummy adhesive that was adhering the insert to the button. The insert then popped out, without any real force being applied to it.
I did this to both the black and white faceplates, and could then swap the inserts around. I did not need any new adhesive, because the original adhesive is quite gummy and was still very sticky. I found that seating them correctly could be achieved by positioning the top of the insert first. There is a very tiny key that the insert will mate up with, ensuring it will be fully seated and perfectly plumb when you press it in.
My next challenge was to remove the cheap looking logo, which just doesn’t do this wonderful device justice. I started off experimenting with the brown faceplate, which I definitely wasn’t going to use. White spirits (mineral spirits to North Americans) did nothing. Acetone (nail polish remover) immediately removed the logo, but also started melting the plastic. A small splash of acetone quickly ruined the brown faceplate’s button insert.
I moved on to the black insert. This time I removed the insert to keep it safe, and I used a cotton bud to carefully apply a small amount of acetone and rub the logo off. This left some scarred melted plastic, which I repaired as best I could by very gently sanding it with 600 grit paper wrapped around the end of a cotton bud, followed by 1200 grit paper. In the end I did so much sanding, that I might as well have skipped the acetone. If I was doing this again, I would have removed the logo using fine-grit sandpaper only.
I also experiemented with mini blow torch on the brown face plate, to see if it would be effective at repairing scratches left by sanding (if I had a heat gun I would have used that). I have previously used this trick to remove scratches on plastic car trim. It didn’t work well here, because it left a glossy melted finish that did not match the matt finish of the original plastic. Don’t do it!
![]()
The final result is acceptable, but if you look closely, you can definitely see that the black faceplate has had some work done.
I also tried removing the logo from the white faceplate. I found that I didn’t need to touch the acetone at all, and that I could remove the logo using just fine grit sandpaper (600 grit, and then 1200 grit). It turned out that the white faceplate is a lot more forgiving. I cannot tell that the area was sanded no matter how close I look. However, the finish on the sanded area of the black faceplate will always look a slightly different.
If you want to copy this procedure, I recommend the use of fine-grit sandpaper only. If you use acetone, you will end up sanding it anyway.
Although the white faceplate looks neater, I do not intend to use it. Even with the button inserts swapped, it is still confusing, and will result in people jamming their fingers into one of the lenses instead of the actual button. Although the black faceplate is not perfect, it is more than good enough and is a huge improvement on the original look of the device.
The next part of this project will be to install this along with a Shelly Uni, so that Home Assistant will be able to sense when the button has been pressed.