Mounting NAS Shares for Frigate in Home Assistant OS
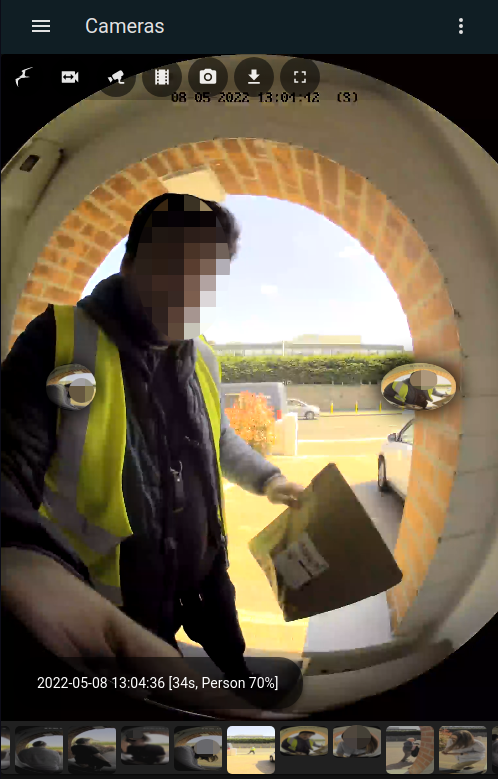
I recently switched my Network Video Recorder (NVR) from Synology Surveillance Station to Frigate, and will never look back. It turns out people say “Frigate is awesome” for a reason. However, if you run Frigate in Home Assistant OS, it is a challenge to record video files to a network share instead of local storage. I finally found a strategy that works. Here’s how I did it.
Background
I have a Synology Diskstation NAS, and had previously been using its “Surveillance Station” software as an NVR. When I set about adding a few extra IP cameras I was surprised to learn that it has a 2 camera limit, and that to add more cameras I would need to buy additional software licenses from Synology, effectively doubling the price of each camera. This spurred me to make the leap to Frigate, and leave the rather basic, slow, cumbersome and crippled Surveillance Station behind.
Frigate is a fantastic piece of open source NVR software that has tight integration with Home Assistant. The combination of Frigate, its Frigate Home Assistant integration, Frigate-Hass-Card and one of the two current WebRTC solutions (see the explainer box in my previous post here) is highly configurable and scalable, has a slick fast UI, with low latency streams, plus real-time local AI object detection and all the associated MQTT events and and Home Assistant sensors you might want to go with that. It is miles ahead of anything else I’ve tried, including cloud solutions like Google Nest.
One problem: when installed as a Home Assistant add-on, Frigate only has access to the local /media directory to store its recordings and clips. If you run Home Assistant on modest hardware, you probably don’t have sufficient local storage available for NVR purposes. I run a Home Assistant Blue (an Odroid N2+) with 128GB, which is okay for event clips, but too small for continuous recording. I needed to find a way to make the terabytes on my NAS available to Frigate.
Summary of My Strategy
I enabled debugging on my Home Assistant host, so that I could SSH directly into the host and mount the network share there. I then set up a regular automation do this wheneven Home Assistant core starts up. Yes… my automation basically breaks out of its container to run commands on the host.
You may think this is either weird, or cool, or evil. I admit that from a security point of view its a step backward. If someone breaks into to my Home Assistant Core docker container, they now also get the keys to the host machine. I’m don’t think the distinction is very important in my network, but I don’t really like it either. Nonetheless I am willing to live with it for now, at least until a better option becomes available.
Related Reading and Other Solutions
-
There is an open RFC to add a network mount manager to Home Assistant. @ukro provides a compelling list of use cases for this (including this use case), and I think it would be a wonderful addition to Home Assistant. If you’re affected by this, consider voting for the feature request and subscribing to that github issue.
-
@ukro’s started a forum thread on configuring NAS shares on Proxmox, and there is quite a lot of discussion from other users about what worked for them, and what didn’t.
-
Various closed Frigate issues (here, here and here) asking for a way to utilise network storage from Home Assistant OS. The reasonable response from the Frigate maintainer is that it isn’t Frigate’s job to mount network shares. This limitation is documented reasonably well.
-
A different solution seems to be to mount USB storage inside the
/mediadevice by modifyingudevrules as described here.
From the threads I’ve read, most people who ask how to store Frigate data on their NAS from Home Assistant OS are eventually told its not possible, and that they should switch to Home Assistant Supervised, or to run dedicated Frigate hardware. Personally, I don’t find this satisfactory. I don’t want to have to buy and run an extra piece of hardware due to a minor software limitation. I would also like to stick as close as possible to the recommended Home Assistant installation pattern, and remain on Home Assistant OS. Finally, I would like to be able to leverage my NAS and the storage I’ve invested in for this purpose, rather than buying new USB hard drives.
My Requirements:
- Use the existing storage available on my NAS
- Don’t spend money and energy on a special host for Frigate
- Don’t abandon Home Assistant OS
- Find a strategy that survives restarts and upgrades
- Gracefully handle startup order up after power failure
My Solution
First, I needed to get SSH access to the Home Assistant host (not to a container). Note that if you use a SSH addon (even the wonderful “SSH & Web Terminal” add on) the environment you are connecting to is a docker container running on the host. Changes you make to the system will not be visible to other containers, and will not survive a restart.
To get SSH access to the host, you need to format a USB key with the label “CONFIG”, place an authorized_keys file on it that contains the public half of an SSH key pair, insert it into your Home Assistant host and reboot. Detailed instructions are given in the developer documentation here. If you follow in my footsteps, I recommend that you create a new dedicated key pair by following the instructions at the bottom of that page, which you should not use for any other purpose. I saved my new SSH key pair under the name homeassistant_rsa.
I could now test SSH to the host using that SSH key.
ssh root@homeassistant.local -p 22222 -i .ssh/homeassistant_rsa
Once in the host, I could observe the location of the media directory is actually /mnt/data/supervisor/media (not /media where it normally appears inside add-ons/containers).
# Location of media directory on host fs
ls /mnt/data/supervisor/media/
I created a new user on my NAS called “frigate” and gave it read-write permissions to a “frigate” shared folder. I then tested that I could mount the share from the Home Assistant host:
# Make a directory mount point
mkdir /mnt/data/supervisor/media/frigate_test
# Mount it (replace 'PASSWORD'  and 'NAS_IP_ADDRESS' with your own values)
mount -t cifs -o 'username=frigate,password=PASSWORD' //NAS_IP_ADDRESS/frigate /mnt/data/supervisor/media/frigate_test
# test writing to it
touch /mnt/data/supervisor/media/frigate_test/can_you_see_me
The curious lifecycle of SMB mounts inside Docker mounts
At this point the share was correctly mounted from the point of view of the Home Assistant host. However, when I checked the
/mediadirectory from a normal SSH session (i.e., from the “SSH & Web Terminal” add-on / docker container) the newfrigate_testdirectory was present but it was empty. It seemed that mounting the share from the host did not automatically propagate into docker containers. I kept on poking around, and noticed that if I restarted the SSH add-on the share properly propagated into the container, and both the/media/frigate_testdirectory and the/media/frigate_test/can_you_see_mefile were accessible. I confirmed that the docker container was able to write to the actual NAS (as opposed to some local file system overlay) by creating a file and checking for it from the host (and directly on the NAS). To satisfy my curiosity, I unmounted the/mnt/data/supervisor/media/frigate_testdirectory from the host to see what would happen to the mount in the docker container… and nothing happened. I could continue to write to the NAS share from the docker container and verify those writes from the NAS, even though the directory was no longer mounted on the host OS. At this point, runningdocker inspecton the container revealed nothing special about the container’s volume mounts.In summary, it seems that network shares mounted by the host are not propagated to docker containers when the shares are mounted, but that any mounts that exist when the container is started up are recreated inside the container, and will survive even if the host unmounts the original share. I’ve been working with Docker on a day-to-day basis for years, and never ran into this behaviour before. I can’t find any documentation that explains it.
The key lesson for our purposes is that host-mounted SMB shares won’t propagate to containers until those containers are restarted.
I successfully confirmed that this also worked the same way for the Frigate add-on by (a) restarting the Frigate add-on so the network share would get propagated to it, and (b) checking its /media/ directory by running the following from either the host OS or the SSH & Web Terminal add-on:
docker exec addon_ccab4aaf_frigate ls /media
# Or getting an interactive terminal:
# docker exec -it addon_ccab4aaf_frigate /bin/sh
At this point I knew I had a plan that would work, so I moved all my existing Frigate data from the Home Assistant Blue’s local storage to the NAS. I first stopped the Frigate add-on, and then I ran rsync from a regular SSH session, and then I removed the original local directory.
rsync -rtP --ignore-existing frigate/* frigate_test/
# -r recursive
# -t preserve timestamps
# -P show progress
# --ignore-existing to allow me to resume the copy if I needed to interrupt it.

# Copying all the data over the network took about 15 minutes.

# At this point, I confirmed the contents of the local `frigate` dir
# were successfully copied to the NAS `frigate` share, so I removed
# the *local* copy to free up space.
rm -rf /media/frigate
Now I needed to set things up so that this share would be automatically re-mounted on the host prior to the Frigate container starting up. First I copied my new “homeassistant_rsa” SSH private key over to the Home Assistant /ssl directory. Then I connected via SSH and set its permissions.
I chose the
/ssldirectory because it already contains secret keys that I tend to exclude from backups. For example, I use the Home Assistant Google Drive Backup addon to automate backups, and have “Partial Backups” enabled so I can exclude the/ssldirectory.
chmod 600 /ssl/homeassistant_rsa
Now I wanted to check that I could SSH from the homeassistant container into the host, because any command that works in that container should also work from the Home Assistant Shell Command integration. I got a terminal in the homeassistant Docker container:
docker exec -it homeassistant /bin/bash
Then from the homeassistant container:
# Test SSH works in principle.
# Note the 172.17.0.1 is the default Docker bridge gateway IP address,
# which is an IP  address that containers can talk to the host over.
# You could instead use your host's LAN IP address, or hostname (e.g., "homeassistant.local")
ssh root@172.17.0.1 -p 22222 -i /ssl/homeassistant_rsa
Given I could access the host from the container like this, I tried running the mount command via SSH (where ‘PASSWORD’ and ‘NAS_IP_ADDRESS’ are redacted):
# Create and mount directory on host via SSH command
ssh root@172.17.0.1 -p 22222 -i /ssl/homeassistant_rsa -C "mkdir -p /mnt/data/supervisor/media/frigate && mount -t cifs -o 'username=frigate,password=PASSWORD' //NAS_IP_ADDRESS/frigate /mnt/data/supervisor/media/frigate"
I could now see the network share mounted at the correct location in the host OS.
I then used the shell command integration to make this command available as a service to Home Assistant automations. From my configuration.yaml file I enabled shell commands with:
shell_command: !include shell_commands.yaml
Then I created a new shell_commands.yaml file containing the SSH command above (again, where ‘PASSWORD’ and ‘NAS_IP_ADDRESS’ are redacted):
mount_frigate_nas: ssh root@172.17.0.1 -p 22222 -i /ssl/homeassistant_rsa -o "StrictHostKeyChecking=no" -C "mkdir -p /mnt/data/supervisor/media/frigate; if ! mountpoint /mnt/data/supervisor/media/frigate; then mount -t cifs -o 'username=frigate,password=PASSWORD' //NAS_IP_ADDRESS/frigate /mnt/data/supervisor/media/frigate; fi"
Next I needed to control how the Frigate add-on starts. First I disabled “Start on boot” in the Frigate add-on. Then I created a new automation that is triggered whenever Home Assistant starts, and which waits for the NAS to become available (I use the Ping integration to create the binary_sensor.diskstation sensor), then I wait for an additional minute to allow any NAS initialisation to complete, then I run the shell command to mount the directory, and finally I start the Frigate add-on.
alias: Mount Frigate NAS Share on Startup
trigger:
  - platform: homeassistant
    event: start
condition: []
action:
  - wait_template: "{{ is_state('binary_sensor.diskstation', 'on') }}"
  - delay:
      hours: 0
      minutes: 1
      seconds: 0
      milliseconds: 0
  - service: shell_command.mount_frigate_nas
    data: {}
  - service: hassio.addon_start
    data:
      addon: ccab4aaf_frigate
That’s everything. When Home Assistant core starts, the frigate NAS directory will be mounted (if it is not mounted already). If the system is starting up from power outage, then the race condition between the NAS and Home Assistant is gracefully handled. This strategy should not be disrupted by system updates. So far, it’s working fine for me.