Automating Heating with Home Assistant
I’ve been on a mission to use Home Assistant to optimize my home heating, with the dual goals of reducing gas usage and increasing comfort. It’s worked out very well - I’ve mostly eliminated wasteful overheating, and I now have much more consistent temperatures throughout the house. Thanks to the power of Home Assistant, I managed to do this without having to invest in new smart devices. In fact, I ended up selling my Google Nest thermostat! I thought I’d share some notes on the process.
Key lessons:
- Smart Thermostatic Radiator Valves (TRVs) are not necessary. Regular TRVs get you most of the way there, if you use them well.
- My Google Nest Thermostat was part of the problem, and I needed to get rid of it to improve my home heating. The problem is that any central thermostat will shut down the boiler as soon as it reaches its target temperature, even if there are other areas in the house that still need to be heated.
- Home Assistant is a wonderful investment that pays increasing dividends over time. In this case, my Home Assistant was already connected to enough smart sensors that it already knew way more about the temperatures in the house than Nest did.
- Home Assistant’s built-in Generic Thermostat integration is a pretty good replacement for Nest temperature control.
- Putting Home Assistant in charge of the boiler opens up many more opportunities for heating automation than could ever be achieved with Nest. For example, Home Assistant already knows who is home and if any external doors are open.
The Initial Problem
It is inevitable that some rooms in a house will cool faster than others (e.g., due to poorer insulation, or more external wall area relative to room volume). Meanwhile, some other rooms will heat faster than others, due to bigger radiators, better insulation, changing sunlight or the presence of large appliances like ovens or dryers. In my house, our nursery both cooled faster and heated faster than any other room in the house. The thermostat (a Nest) controlled the boiler from the living area, and would often turn off the boiler while the nursery was still chilly.
Failed Solutions:
- Increase the target temperature on the TRV. This would only result in the temperature swinging between too hot and too cold, instead of being mostly too cold.
- Move the thermostat. Moving the thermostat to the nursery would simply have reversed the problem. The boiler would shut off as soon as the nursery reached the target temperature, while larger rooms were still heating.
- Install Smart TRVs. This doesn’t actually address the initial problem at all. Smart TRV can’t heat a room if the boiler has been switched off by a central thermostat.
The Home Assistant Solution
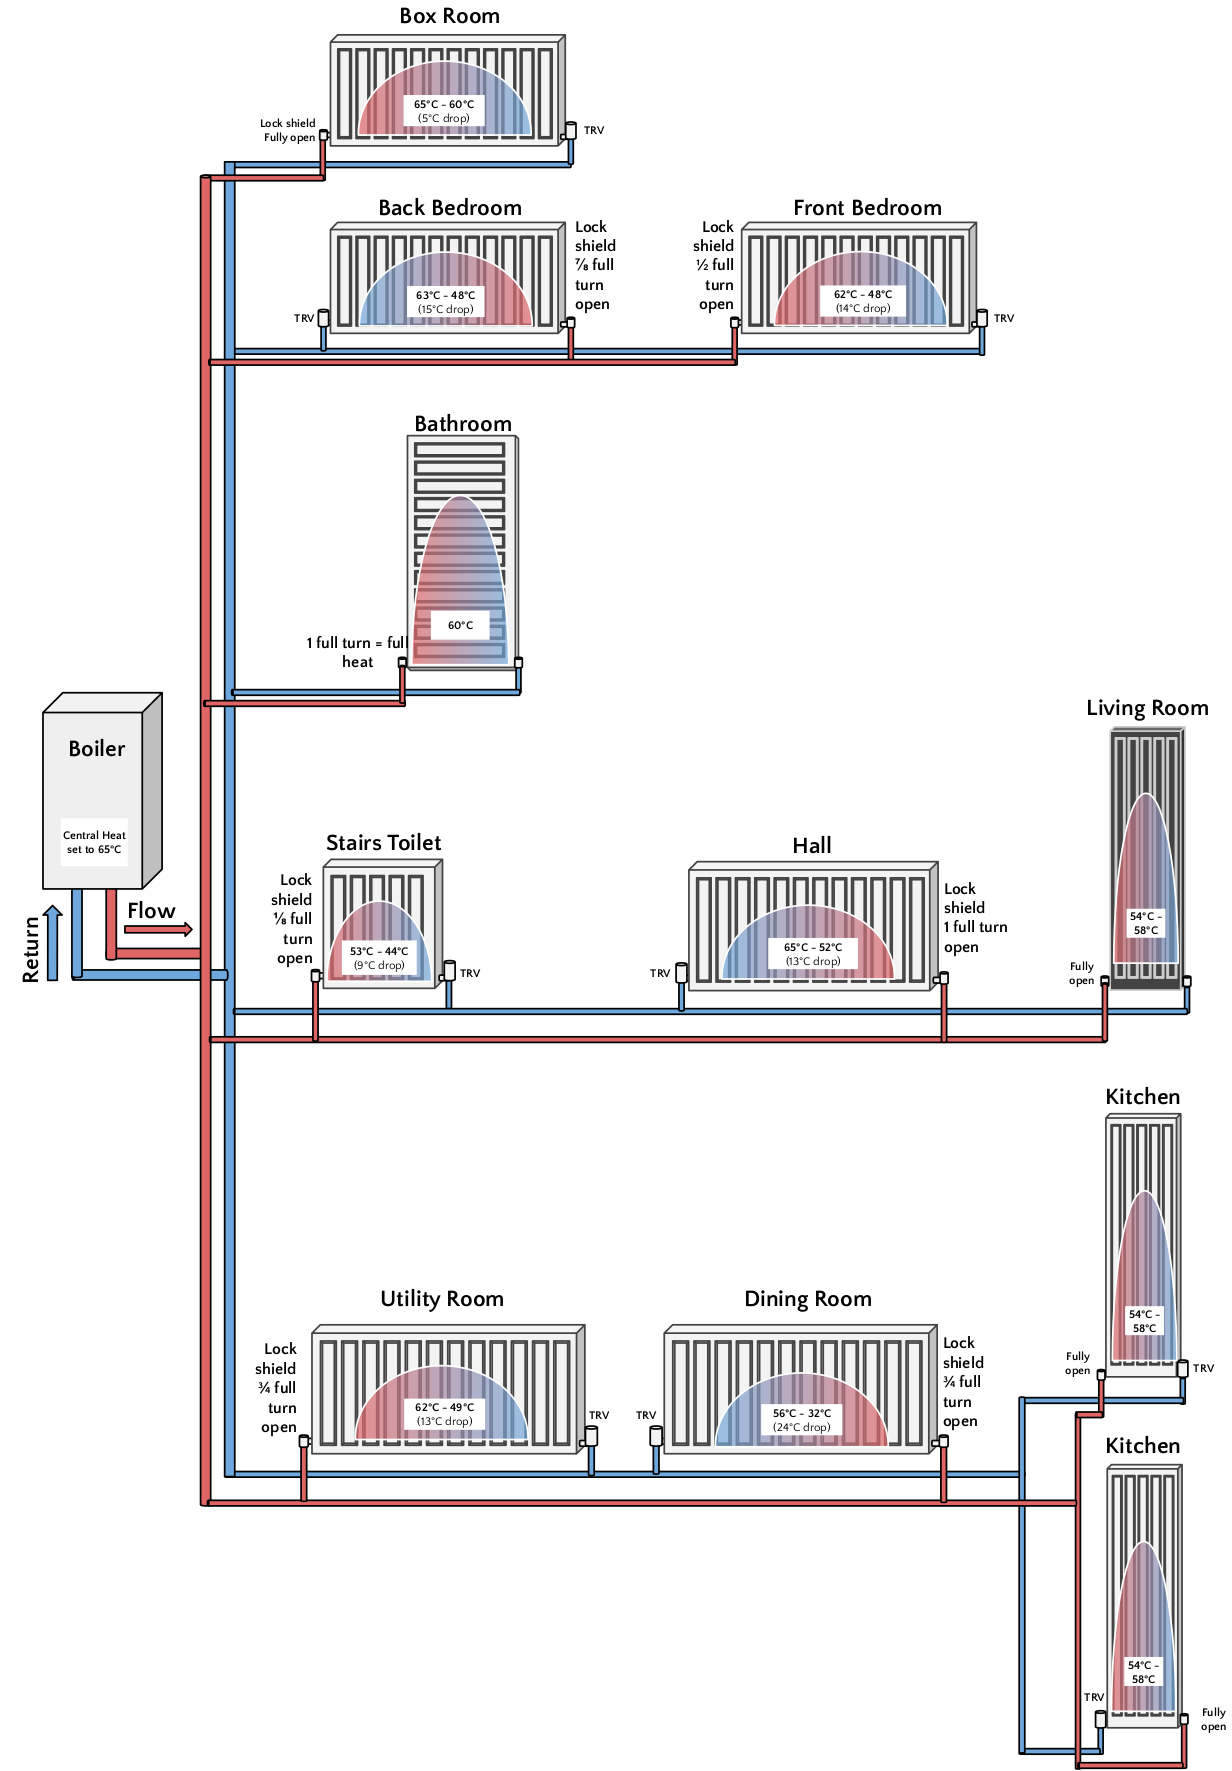
A preliminary step was some basic plumbing maintenance to make sure the radiators were working well. I mapped out how the radiators were connected by following pipes, judging which radiators heated up first, and made some educated guesses. I then balanced the radiators to ensure that they all received a good flow of heat from the boiler. After figuring all this out, I drew up a schematic, noted the lockshield valve positions on it and posted it inside my boiler cabinet as a favour to future-me.
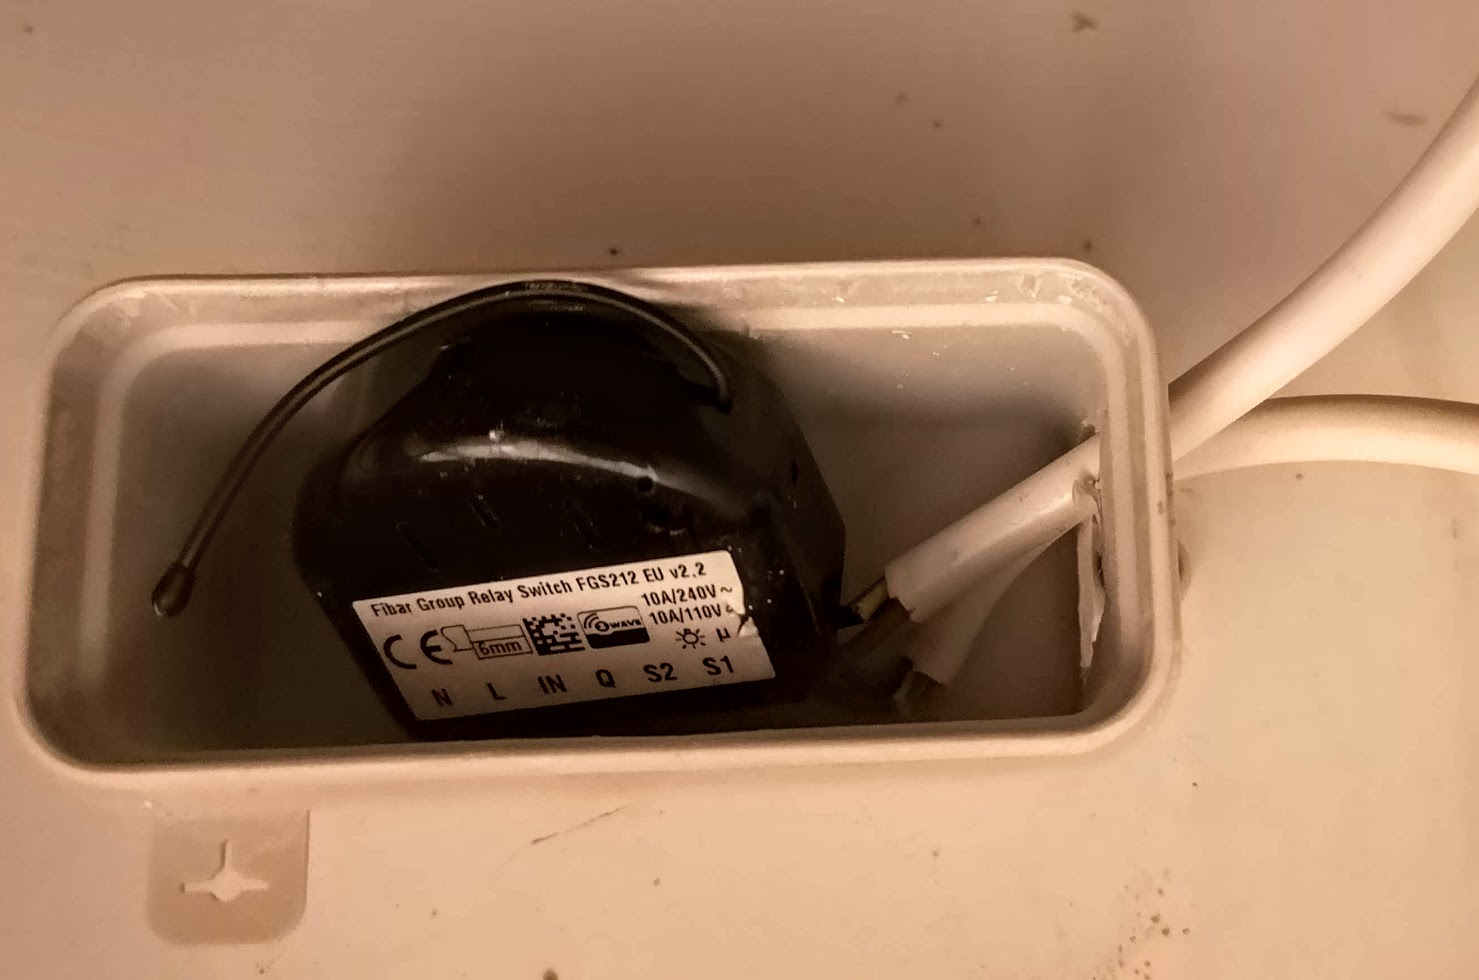
I then removed the Nest Thermostat, disconnected the Nest Heat Link from the boiler, and two hours later had sold it for a fair price via a local classified ads website. I replaced the Nest Heat Link with a relay switch that I could control from Home Assistant (a spare Fibaro FGS-212 Z-wave relay switch that I had in a drawer). I was able to directly transplant the wiring from the Nest Heat Link into the relay switch. I could now control the boiler from Home Assistant.
Next came the Home Assistant configuration. I used the min/max platform to pick out the coolest temperature sensor from a list of sensors that were already installed around the house (most of these are primarily motion sensors that also expose a temperature sensor, but some are dedicated zigbee temperature sensors I previously installed for monitoring temperatures).
I recommend using a Min/Max helper to create the “coolest room temperature” sensor. When I first implemented this approach, this helper didn’t exist yet, so here is the yaml code that achieves the same thing:
sensor thermostat:
 - platform: min_max
   type: min
   name: coolest_room_temperature
   entity_ids:
     - sensor.bathroom_temperature_calibrated
     - sensor.boxroom_temperature_calibrated
     - sensor.dining_room_temperature_calibrated
     - sensor.hall_temperature_calibrated
     - sensor.kitchen_temperature_calibrated
     - sensor.landing_temperature_calibrated
     - sensor.master_bedroom_temperature_calibrated
     - sensor.stairs_toilet_temperature_calibrated
These “_calibrated” sensors are actually template sensors that I had previously created to incorporate a temperature correction. From experimentation I have determined that my Fibaro and Aeotec sensors are highly accurate, but my Philips Hue motion sensors report temperatures 1 - 2 degrees Celsius below the true temperature.
I then used the Generic Thermostat platform to tell Home Assistant to use the boiler relay switch and the temperature sensor to make a new Thermostat entity.
climate:
 - platform: generic_thermostat
   unique_id: combi_boiler_generic_thermostat
   name: Boiler Thermostat
   heater: switch.combi_boiler_relay_switch
   target_sensor: sensor.coolest_room_temperature
   target_temp: 18
   cold_tolerance: 0.0
   hot_tolerance: 0.0
   precision: 0.5
   min_cycle_duration:
     seconds: 30
   initial_hvac_mode: "heat"
   away_temp: 15
   comfort_temp: 21
   home_temp: 19
   sleep_temp: 17
The above code is using the preset functionality introduced in Home Assistant release 2022.02, to define various presets, such as away, comfort, home, sleep etc.
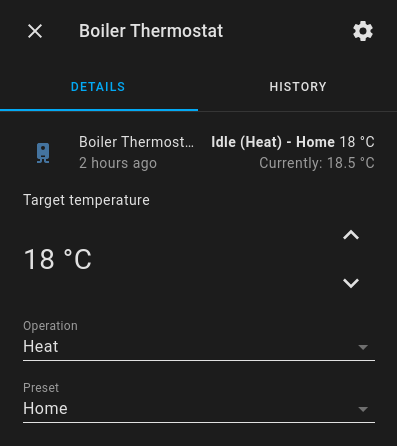
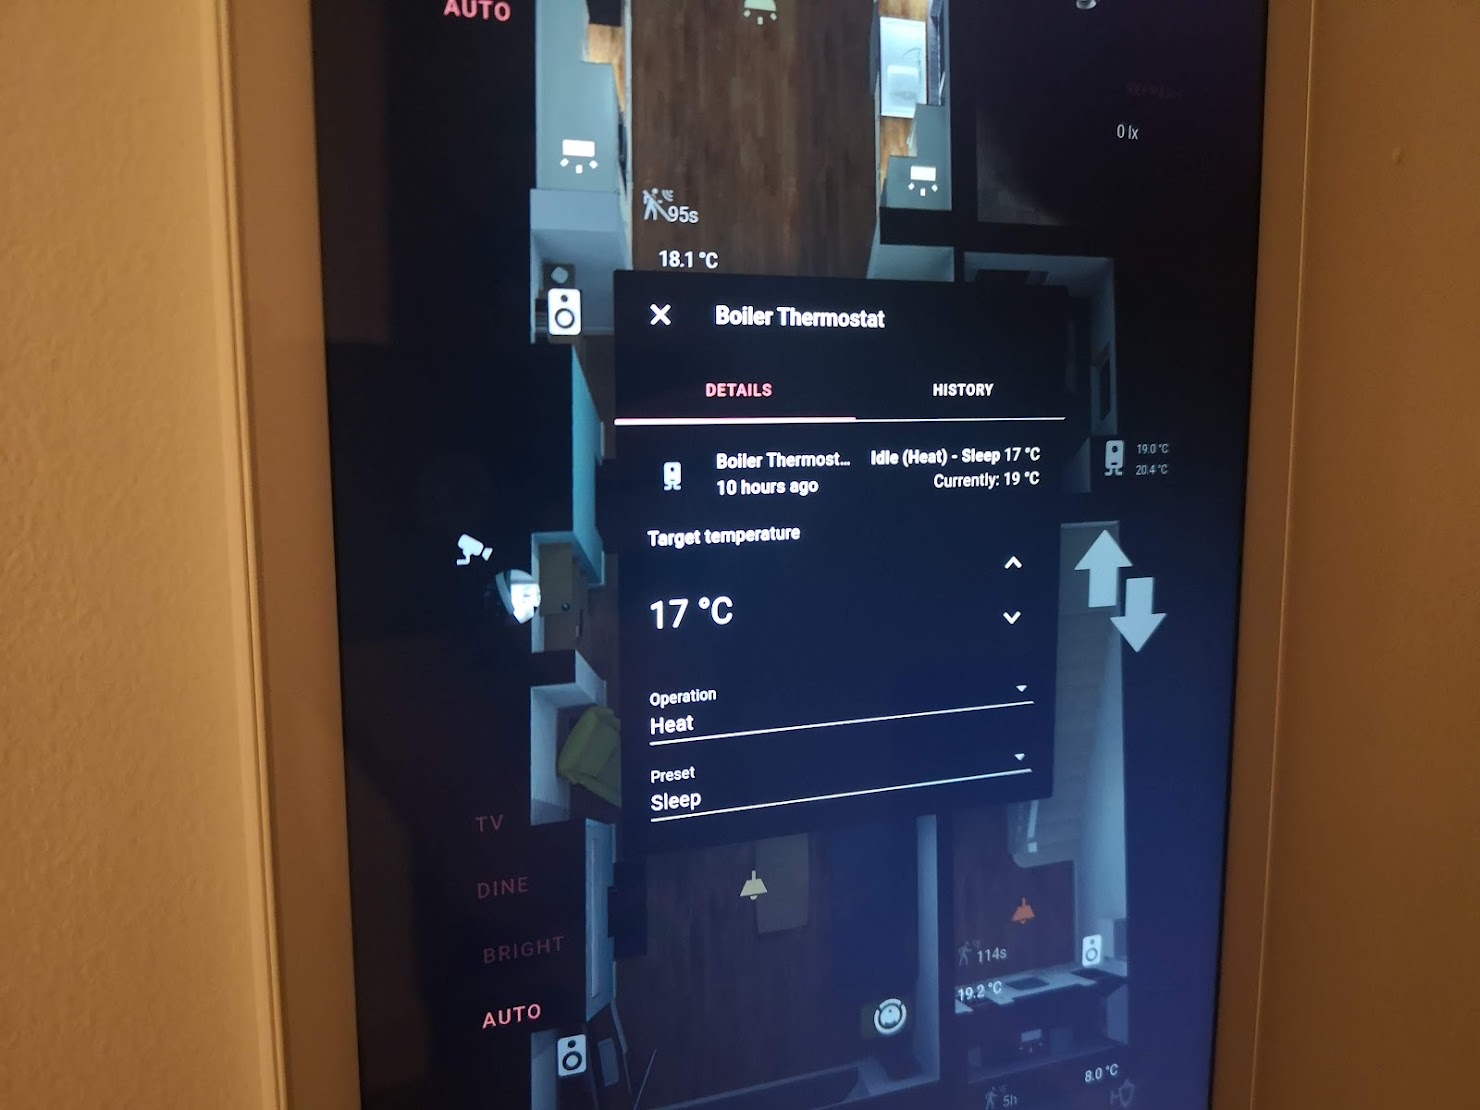
I could then add the new thermostat entity to the Home Assistant UI and use it to control my home heating.
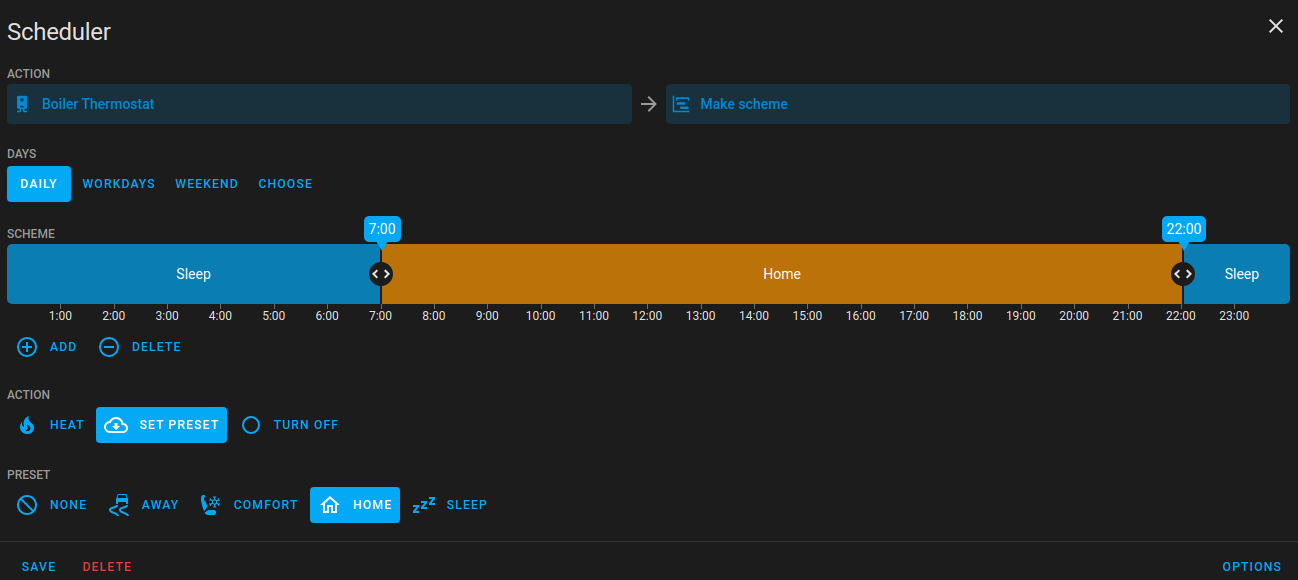
I began writing some automations to automatically switch between the “home” and “sleep” presets, but for usability’s sake I instead installed the Scheduler Component and set up the schedule there (thanks to the helpful tips in this post).
I supplemented this with some automations to switch the thermostat into “away” mode if everyone has left the house, and to switch back into either “home” or “sleep” mode whenever any returns. I then added some more automations to avoid wasting energy by temporarily switching off the boiler if any external doors are left open for any reason. I’m sure that over time, the list of heating automations will expand.
September 2022: I found the scheduler component above a little hard to find when I needed it. It is strange to have automation rules outside the normal automation engine. In September 2022 Home Assistant introduced the “Schedule” helper, and I removed the custom Scheduler Component, and instead created a Schedule helper called “Thermostat night mode”. I then added a few regular automations to switch the thermostat mode according to this schedule.
The final piece of the puzzle was to spend a few days monitoring the temperatures in the house, adjusting the TRVs in each room to ensure that each room could reach the target temperature but would not overshoot it.
The end result is very even heating throughout the house, with all rooms within 1℃ of each other. The thermostat settings are available on the main wall tablet, and easy for anyone to use. The regular radiator system is balanced and the TRVs are tuned so that each room will heat quickly to the target temperature and stop. Meanwhile, Home Assistant makes sure that the boiler is on whenever a radiator TRV might want to open up, and that the boiler turns off whenever it is not needed or would be wasteful.
Limitations
Some community members have rightly pointed out that this approach assumes one target temperature for the whole house. It is not possible to have different temperatures for living areas and bedrooms, for example. Smart TRVs may solve this (see next section). My defense is that in ideal circumstances, a house should be a well insulated box. Therefore, heating different parts of the box to different temperatures is futile - all parts of the box will soon equalize. Home insulation should be the first area of investment, before considering smart TRVs or the kind of setup I describe in this post. Admittedly, only recently-built passive houses are likely to approach the ideal standard of zero heat loss. All I can say is that my house seems to be a reasonably-well insulated box, but your mileage may vary.
Another drawback is that if I want to increase the target temperature, I need to first retune all the TRVs to make it possible for that temperature to be reached. Right now, the TRVs allow each room to reach about 20℃. If I increased the thermostat to 21℃ (or set the thermostat to the “comfort” preset), the rooms would not reach the target temperature because the TRVs would prematurely close the radiators, and meanwhile the boiler would never be shut off.
A converse drawback is that if turn the thermostat down, the house temperature may become uneven. For example, if I change the preset to “sleep”, the target temperature is changed to 17℃. The boiler will kick in for a bit when any room drops below 17℃. During the time the boiler is on, some smaller rooms may heat up to their maximum TRV temperature of 20℃, which is a waste of energy, and might leave those rooms uncomfortably hot.
The Marginal Value of Smart TRVs
Smart TRVs are cheaply available, such as the ZigBee-controlled HY386 (currently €22.28 on AliExpress). I discussed this in some detail in a previous post. I see two main benefits to replacing existing my regular TRVs with these smart TRV:
- They can be reconfigured with new target temperatures whenever the thermostat temperature is changed. This fully addresses the limitations discussed above.
- They can be explicitly actuated by Home Assistant based on the temperature from a separate sensor in the middle of the room. This might be an improvement on letting them actuate themselves based on the temperature they read from their location near the bottom of the radiator.
I haven’t decided if these benefits are compelling enough to warrant the installation of eleven new battery-hungry devices around the house.
If you made it this far…
If your home heating is similar to mine, you might also be interested in how I created virtual gas meters using Home Assistant, to give me a real-time view into our gas usage.
Reddit Discussion
A bunch of well informed community members have shared their opinion on my approach on Reddit. The thread is well worth a read.